
There’s a unique magic in capturing the essence of summer, especially when it transforms fragrant blossoms into a golden elixir. This year, I embraced the quiet rhythm of slow living and made my own homemade Elderflower Syrup. It’s simpler and more rewarding than you might think – a truly mindful process.
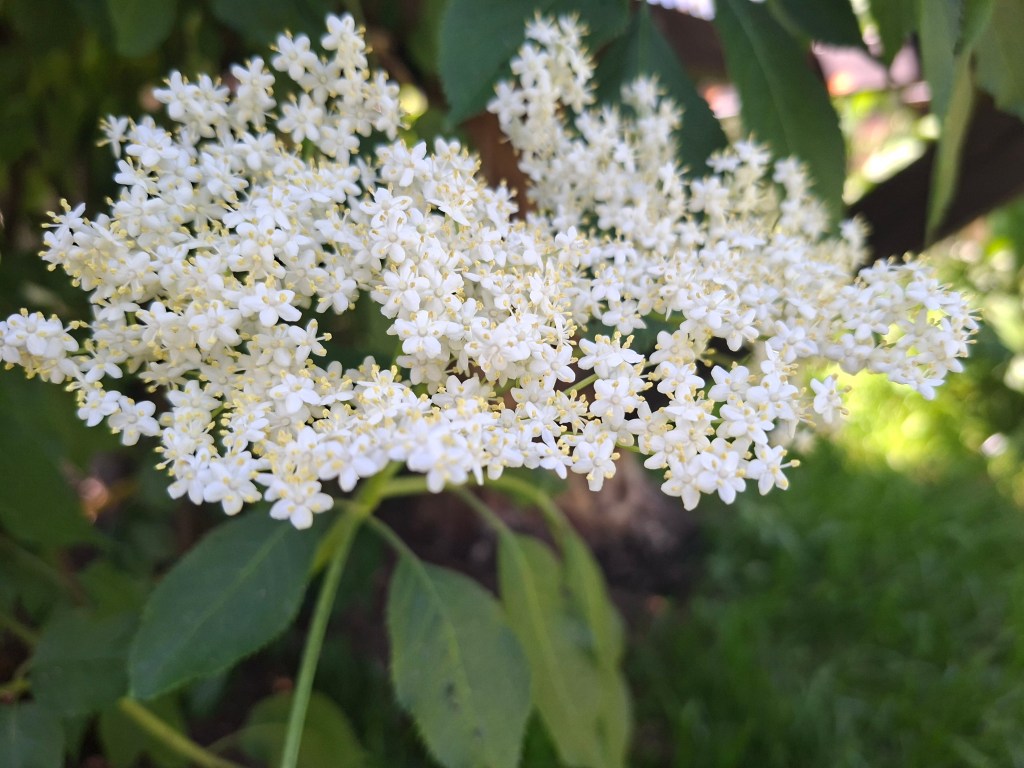
The elderflower season is so brief. It’s that short, precious time when the air fills with their sweet, honey-like scent. For me, it’s a gentle nudge to slow down. To notice the gifts around us. To capture a little bit of that beauty before it’s gone. So, when I saw so many creamy white elderflower heads near my home, it wasn’t just about picking flowers. It was about honoring the season, taking the time to gather.
From Bush to Bottle: A Mindful Elderflower Adventure
My first step was a calm, deliberate foraging trip! I carefully collected over 60 elderflower heads. The best time? A sunny, dry day when their perfume is strongest. And yes, a quick note for the squeamish – you might find tiny bugs on the blossoms. I see them as a sign of nature. A gentle shake usually dislodges most. The steeping process takes care of the rest. It’s a tiny, natural imperfection in a perfectly organic process.
Back in my quiet kitchen, I gently placed the elderflower heads in a large, clean container. This isn’t a rushed task; it’s a calm arrangement. Then, I added several sprigs of fresh mint from my garden. Their vibrant green and fresh, peppery notes contrast beautifully with the elderflower’s sweetness. Next, the essential citrus: thinly sliced lemons. Their zest and juice are key for both flavor and balance.
I poured about 5 liters of cold water over everything – the blossoms, mint, and lemons. The goal is simple: make sure all the solids are fully covered. I used a clean plate to gently press everything down, so the elderflowers stayed under the water. This mixture then rested patiently, soaking up all those wonderful flavors, for 24 to 48 hours in a cool spot. This waiting time, letting nature do its work, is where the “slow” truly happens. The longer it steeps, the richer and deeper the elderflower flavor will be.
The Sweetening & Preserving Stage: A Labor of Love for Future Joys
After its fragrant soak, it was time for the next unhurried step: straining and sweetening. Then came the comforting ritual of water bath canning. This traditional method lets you enjoy your syrup long after summer has passed. It’s a simple act of preserving nature’s abundance.
Here’s what you’ll need:
- Large, clean pot for making the syrup
- Fine-mesh sieve
- Cheesecloth (or a clean, thin kitchen towel)
- Your largest pot for water bath canning (tall enough for your jars, with a rack at the bottom)
- Clean canning jars with new lids and rings (e.g., 250ml or 500ml jars – pick sizes that fit your needs)
- Jar lifter, canning funnel, ladle
Step-by-Step Instructions:
- Strain the Infusion, Gently: Carefully strain the infused liquid into a large, clean pot. Use your fine-mesh sieve lined with cheesecloth. Take your time. Gently press and squeeze out as much liquid as you can from the elderflowers, mint, and lemons. This step pulls all that beautiful flavor into your syrup. Discard the used plant material, perhaps to your compost. What’s left is a lovely, pale yellow liquid, full of summer’s promise.
- Add Sweetness: For every liter of strained liquid, you’ll add 1 kilogram (2.2 lbs) of granulated sugar. So, for my 5 liters, I used 5 kilograms of sugar. Stir the sugar into the cold liquid until it’s mostly dissolved. Don’t rush this; just let the sugar melt into the elderflower essence.
- Heat the Syrup, Slowly: Place the pot over medium heat. Stir constantly. Watch as the sugar crystals disappear and the liquid begins to shimmer. You don’t want a hard boil – just a gentle simmer. This gentle heat helps all the sugar dissolve completely. It usually takes about 5-10 minutes. Skim off any light foam that forms on top. Now, your delicious elderflower syrup is ready!
- Prepare for Canning: This step helps your syrup last all year, a small act of preserving summer.
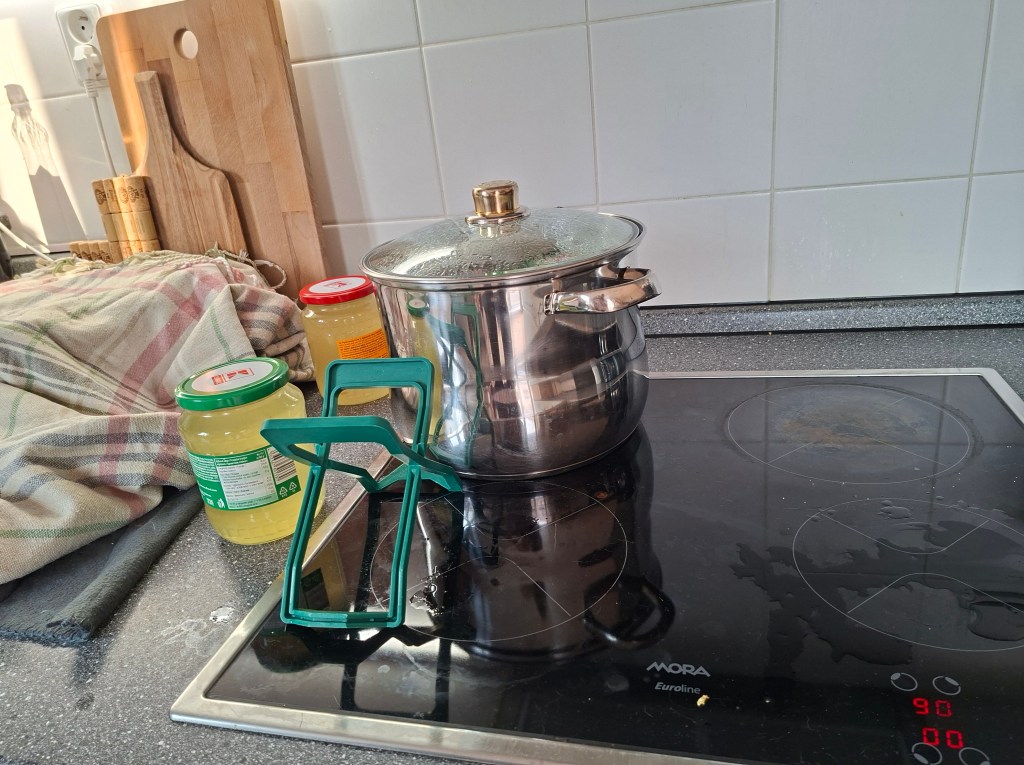
- Sterilize Jars & Lids: While your syrup simmers, get your jars ready. Wash jars and lids thoroughly in hot, soapy water. Rinse them well. You can sterilize them by boiling for 10 minutes, or use a hot dishwasher cycle. Keep the jars hot until you fill them. This prevents glass from cracking when hot syrup goes in.
- Set up the Water Bath: Put a canning rack at the bottom of your largest canning pot. Fill the pot about halfway with water. Bring it to a gentle simmer (around 85°C / 185°F). This warm bath will be ready for your filled jars.
- Fill Jars, Carefully: Use a canning funnel and ladle. Carefully pour the hot elderflower syrup into your hot, sterilized jars. Leave about 1/2 inch (1.25 cm) of space from the top. This “headspace” is key for a good seal.
- Seal with Care: Wipe the rims of the jars perfectly clean with a damp cloth. Any syrup on the rim can stop a proper seal. Place the new, clean lids on each jar. Then, screw on the bands “finger-tight” – just until you feel resistance, then a tiny bit more. No need to overtighten.
- Process in the Water Bath:
- Carefully lower the filled jars into the simmering water bath using your jar lifter. Make sure jars aren’t touching each other or the pot’s sides.
- Add more hot water if needed, so the water covers the jars by at least 1 inch (2.5 cm).
- Bring the water to a full, rolling boil (100°C / 212°F).
- Once it’s boiling, start your timer. Process the jars for 10 minutes. (If you live at a high altitude, over 1,000 feet / 300 meters, you might need to adjust this time. Always check a reliable canning guide for your specific altitude.)
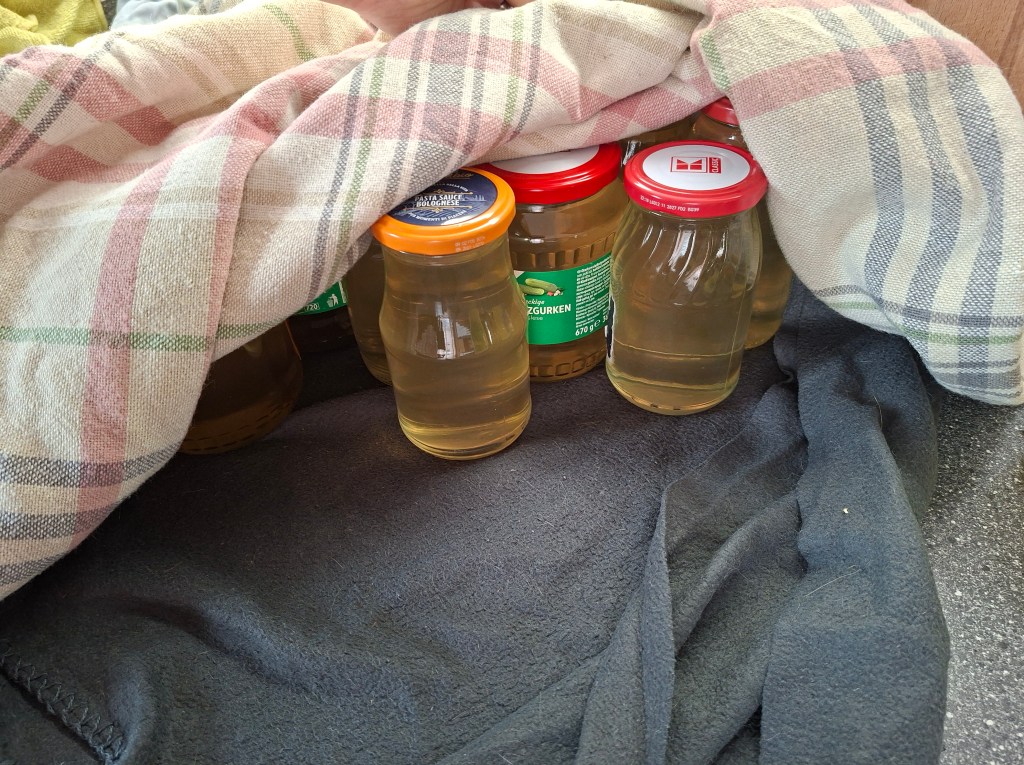
- Cool & Check Seals, with Patience:
- After 10 minutes, turn off the heat. Carefully remove the jars from the water bath with your jar lifter. Place them upright on a wire rack or a folded towel in a draft-free spot. Let them cool completely, undisturbed, for 12-24 hours. Do not tilt or touch the lids during this time.
- As they cool, you’ll often hear satisfying “pinging” sounds. This means the lids are sealing – a little symphony of preservation.
- Once completely cool, check the seals. Press down on the center of each lid. If it doesn’t flex, it’s sealed. If it moves, the seal failed. That jar of syrup needs to be refrigerated and used within a few weeks. But don’t worry, even unsealed jars are perfectly good for immediate enjoyment!
The Rewards of Homemade Elderflower Syrup: A Sip of Slow Living
The first taste of homemade elderflower syrup is truly special. It’s like sunshine in a glass – sweet, floral, with a hint of citrus. We love diluting it with sparkling water for a refreshing summer drink, adding it to cocktails, or drizzling it over pancakes and desserts. Each sip reminds me of the quiet hours spent harvesting, infusing, and preserving.
Making this syrup was a simple joy. It connected me to the rhythm of the seasons. It also gave me a delightful taste of summer to enjoy long after the elderflowers have faded. With careful canning, you can keep this liquid gold in a cool, dark place for up to a year (or even longer!). It’s always ready to bring a touch of summer to any day.
Have you ever made your own homemade elderflower syrup or another seasonal preserve? I’d love to hear about your experiences and favorite ways to use nature’s bounty in the comments below!
Interested in some other recipes?
Bread in Egg – Simple Comfort, Zero Waste

Pridaj komentár